Before we start, we need couple of things:
1) Photoshop CS5 - I prefer it, because of amount of tools and features.
2) Imagination - You need at least and idea, what do you want to create and how it should look.
3) Patience - You will need a lot of this. And remember the bigger ship, the more time it takes.
As example, I will use IDF Frigate "Hesed", it takes for me about 15~19 layers per ship.
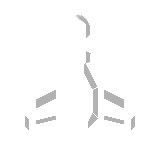
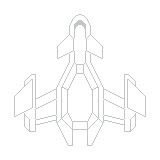
01. Let's start from sketch, or rather I call it
Design Layer:
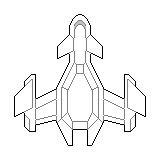
Bear in mind, when you're creating design, you must plan ahead, where you will place turrets, engines, hardpoints, hangars and windows.
First you make approximate sketch of how ship should look. Then you refine it, until you look satisfied. And after that you start add some basic details, that will give this ship basic form.
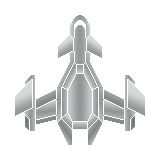
02. Next thing we need to do is to fill empty space between ships lines, I call it
Filling Layer:
+
=

In my case I used gradient tool in Photoshop, but it can be anything, monotonic color, texture & etc. Depends on how you want your ship to look: metallic, bionic & etc.
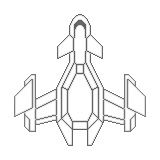
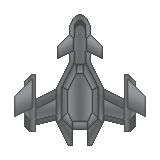
03. It's important to make ship look more or less seamless, thus I use here
Outline Layer:
+
=
In my case I just copied
Design Layer, changed it's color in to monotonic Dark Grey, added 50% opacity Outer Glow property of same color with 1 pixels size, then flattened it and removed outer glow part, that passes over original
Design Layer. Now we got more or less harmonic ship sprite.
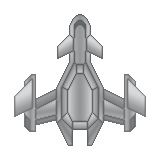
04. If you think that current ship sprite is too bright or too dark, you can add
Tone Layer to help with that:
+

=
For me ship was too bright, and thus I fixed it by adding 30% opacity layer with black color.
05. Now its time to give to sprite more realistic looks, it will benefit you in future, in other words
Shadows Layer:
+
=
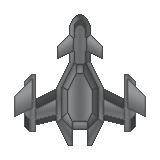
Almost same as Tone Layer, except that you black out only parts of ship that should be more dark due the shadows. I used black color layer with 30% opacity here.
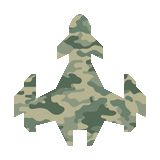
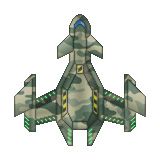
06. So far it looks good enough, but because ship now colorless, it's kinda depressing, so we fix it with
Overlay Layer:
+
=
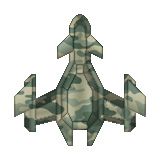
I just took some camouflage texture, cut it to have for of the ship and then turned whole layer in to Overlay Mode with Photoshop. If ship turns out to be too bright or too dark you can change opacity of
Tone Layer to fix it.
07. Sometimes
Overlay Layer obscures original outlines, thus making it less detailed and this why I use
Overline Layer:
+
=
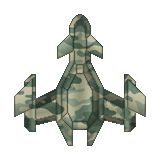
Here I used 30% opacity of main ship's color, for me it was dark green. My opinion that it made ship more detailed.
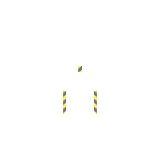
08. Now we start to add decorations to ship to make it look like a real one. Decorations can consist from multiple
Decoration Layers:
+

+
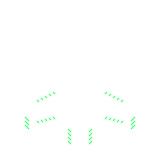
+
=
I used 3 layers for decorations: windows, lights and danger lines. But it can be anything.
09. Next layer I used to give ship more realistic looks and I called it
Plating Layer:
=>
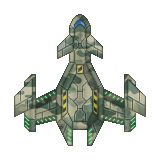
In my case it was dark lines with bright 1 pixel outline. It can symmetric or asymmetric, it can be just dark lines, or lines with pixels that represent rivets, flexible alien alloys & etc. Bear in mind, when you creating Plating Layer it must be in harmony with already predefined hangars, turrets & hardpoints layer, that will be above it. I was satisfied with my IDF Frigate "Hesed" final look

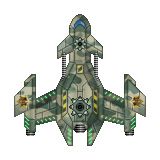
10. Now it's time to add to your ship unique sign of you race or civilization, it's called
Insignia Layer:
=>
Just place you sign whatever you like, so everybody could see it. Better to place it where it won't be obscured by turret or something else.
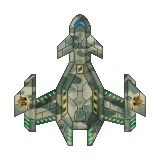
11. And the last one set of layers are
Equipment Layers:
=>

=>
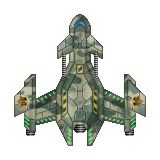
=>
For me it took 3 layers, one for engines, one for external decorations and one for turrets and hardpoints.
P.S. This is actually first spaceship sprite I ever created from zero, just from my own imagination. I hope it will help other people who want and don't know where to start as it helped me


 Author
Topic: Making Spaceship from Scratch (Tutorial) (Read 41166 times)
Author
Topic: Making Spaceship from Scratch (Tutorial) (Read 41166 times)