Well, here, I'll try to show, not just tell. I can't rework this whole thing, that's a giant project, but I'll tackle a little:
Step 1: Adjust everything with Curves to increase contrast strategically. First, duplicate the layer, so that you have the original sitting underneath to use as a reference and to add the result to via transparency adjustments.
Click on Image --> Adjustments --> Curves to open up the Curves tool, then add a couple of control points, one near the top-right (white point) and one near the bottom-left (black point).
Then adjust to get the best result. For this, the white point adjustment point needs to go up and leftwards, inverse for the black point. This will hopefully make sense when you play with it, and bear in mind that it takes a little while to apply sometimes, so adjust a little and check it out.
Note that the "best" result will not preserve your hand-drawn colors; that's inevitable, but ultimately it's less important than fixing the blacklining.
In the future, do your colors in Photoshop, using the scan of the black and white drawing as the master. That makes this stuff much, much, much easier, because you can fix each part, use transparency lock to prevent problems and do color corrections quickly.
Here, well, we need to fix what we've got

Another option is to simply duplicate the layer and select Overlay, which will have pretty similar effects but with a less control.
When the result's nice and sharp, then you can stop.
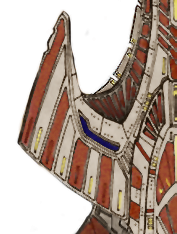
Here's a quickie adjustment example:
After that, it's down to color correction, overpainting and detailing, blacklining the edges, etc. I'd definitely mirror the ship for all of that to save time, it's going to be a lot of labor to get all of those edges highlighted.


